There’s a high chance for you as a blogger that you need high-quality images for your blog. This is because images play an essential role in getting people interested in reading your articles or blog posts.
However, it can be costly to get software that allows you to edit the images that you need to use. This is where a tool like Canva comes into the scene. Using Canva you will be able to create great images for your blog.
You have been on the losing side if you haven’t heard of or used Canva for creating and editing images for your blog. This graphic design tool is a free online editing tool.
This is what makes it perfect for bloggers, especially new bloggers who need to design fancy logos for their blog, create images for sharing on different social media platforms, and create or edit photos to brighten up their posts.
In case you don’t know how to get started with this tool, this article is a guide on how to edit images for your blog with Canva.
Using Canva – An introduction
Canva has many options to give you a stunning layout, and there are also several elegant choices for fonts. This might be overwhelming for you if you’re opening this software for the first time or just getting started.
However, the good thing is, you don’t have to try and work through this all by yourself.
Canva offers the users a lot of informative and simple tutorials that will help first-time users or people who aren’t used to the tool yet wrap their heads around how it works, the things they can do, and how they can create with it. Read them at Canva Design School.
There’s a guide for everything on this tool, even for shapes and branding, so you won’t need much time before you can get used to this design software and become an expert at it.
Finding the Perfect Fit
Once you’ve taken your time to learn how to use the Canva tool well, you can start working with it.
This tool has many templates ranging from social media backgrounds that are perfectly-sized and are used to brilliantly capture the attention of your social media followers to other designs necessary for headers and blog graphics.
It’s also possible for you to enter the dimensions that you need your image size to fit into.
After picking the perfect size, you’ll have a blank canvas on which you can unleash your creativity. You can also upload your own image so that it appears even more attractive.
How to give your images flair & pop
You can make use of Canva in a way that just about any standard photo can become worthy of a place in the National Gallery within a few minutes.
Beautifully created pictures and images are usually attractive and eye-catching, and this is something that you can achieve with Canva without needing to pay hefty sums of money. All you need to do is:
- Upload your choice of photo.
- Click on ‘Filter.’
This will open up a wide range of fantastic options for editing the image and explore your creative world.
You can make use of editing options that are similar to Instagram filters without experiencing any hitch. Blurs can be an excellent option to make sure that the focus is placed on your image.
This will also give the image a timely touch that is common with many artsy bloggers.
Getting creative with the image
It doesn’t matter if you’re using an image that’s newly polished or starts to work without an image from scratch, you might have issues with knowing what next to do.
But if you’re looking to add some color to your design, then you can choose one of the numerous free backgrounds and colors of your choice with just one click.
The next thing that you might want to do is add a font with the title of your next blog post, a motivational quote, or any other message that you want to add.
This is very easy to accomplish, according to college paper reviews and you have hundreds of free templates and different fonts from which you can choose from, and you’re going to find more than one that you like.
All you need to do is just drag and drop, and you can click on it if you want to add a text to it.
Like other masterpieces, the image that you create with Canva may need a frame. So, you can look through to the left-hand side for the ‘Layouts’ tab. Then again, all you need to do is drag and drop.
Creating Images with Canva
Creating an image for your blog with Canva is very easy. The processes are pretty straightforward, and it only takes some minutes.
When making an image, it has to have a translucent layer, a background image, and text that can quickly grab social media users and blog readers’ attention. To create an image, here are some steps that you have to follow:
- Create a Canva account
The first thing that you need to do is create a Canva account and login to it. You’ll see a dashboard on the screen, browse around to explore the most popular formats such as Instagram story, Facebook post, Tumblr header, etc.
As you design your blog image, you can use the option for custom dimensions.
Click on the button for custom dimensions at the Window’s top right corner, then type the resolution for the image you’re creating.
Click on ‘Create New Design,’ and you’ll see a new page with the Canva Editor.
- Include a background image
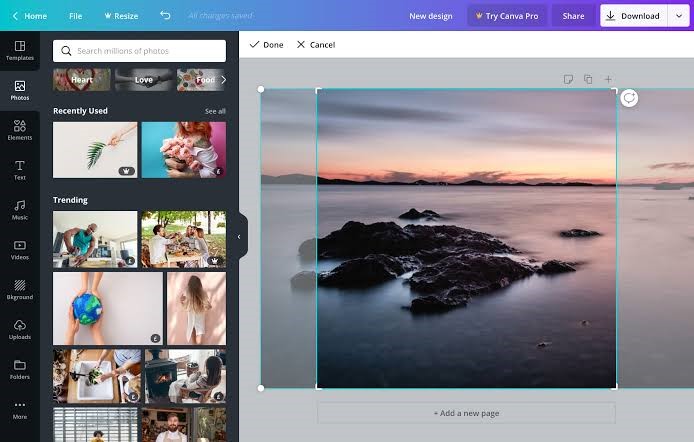
Two elements to look out for are the toolbar at the screen’s top and the left sidebar. You’ll find graphics, images, templates, and assets that you’ll need with the image you upload.
The toolbar shows your option based on the element you select.
- Include a translucent layer
The translucent layer goes on the background image. It is essential to increase the readability of your text.
Click on ‘Elements’ from the sidebar, then select ‘Shapes.’ Then resize the shape for it to take the whole Canvas.
- Add text
There are two ways to add texts. You can design the text or use a text template. Although the templates are beautiful, they’re added to edit because they’re designed for posters.
You can go to the sidebar for the text option to explore the Canva templates.
- Add logos and graphics
You might need to add an icon or graphic on your image or your website’s logo at the image corner. Click on ‘Elements’ and choose ‘Graphics.’
When you see the graphics that you want, you can click on the graphic and add it to your image.
Once you add the image, you can crop and resize it.
Conclusion
It’s quite simple to use Canva. Once you set up an account, you can always play around with your designs.
Featured Videos
Emma Coffinet is a content creator for websites, blogs, articles, white papers, and social media platforms, assignment help, such as at EduGeeksClub. She is keen on capturing the attention of a target audience. She keeps herself well-read with the changing trends of the web world. Emma loves to pen down her knowledge in an engaging and simplified way. She also enjoys leading, motivating, and being part of a productive team; equally comfortable working on her own initiative. Feel free to connect with her on Twitter.

