DokuWiki Setup is a simple guide to setup DokuWiki on Debian (or Ubuntu). However, you can use the following instructions on every Linux server (with small changes).
DokuWiki is the ideal wiki for (technical) documentation, hence the name “dokuwiki”. It is created by Andreas Gohr.
DokuWiki is written in PHP. A web server is required. In this tutorial I use Apache. I will set up a demo wiki with the “name” wiki.example.com.
You will love DokuWiki! Here is why:
- 10 minutes setup
- Simple, fast, lightweight
- Feature-rich. It supports plugins
- No database is required (it uses flat files)
- Easy backup (just copy the directory)
- Excellent documentation
- Open-source, free
- Great community
Download
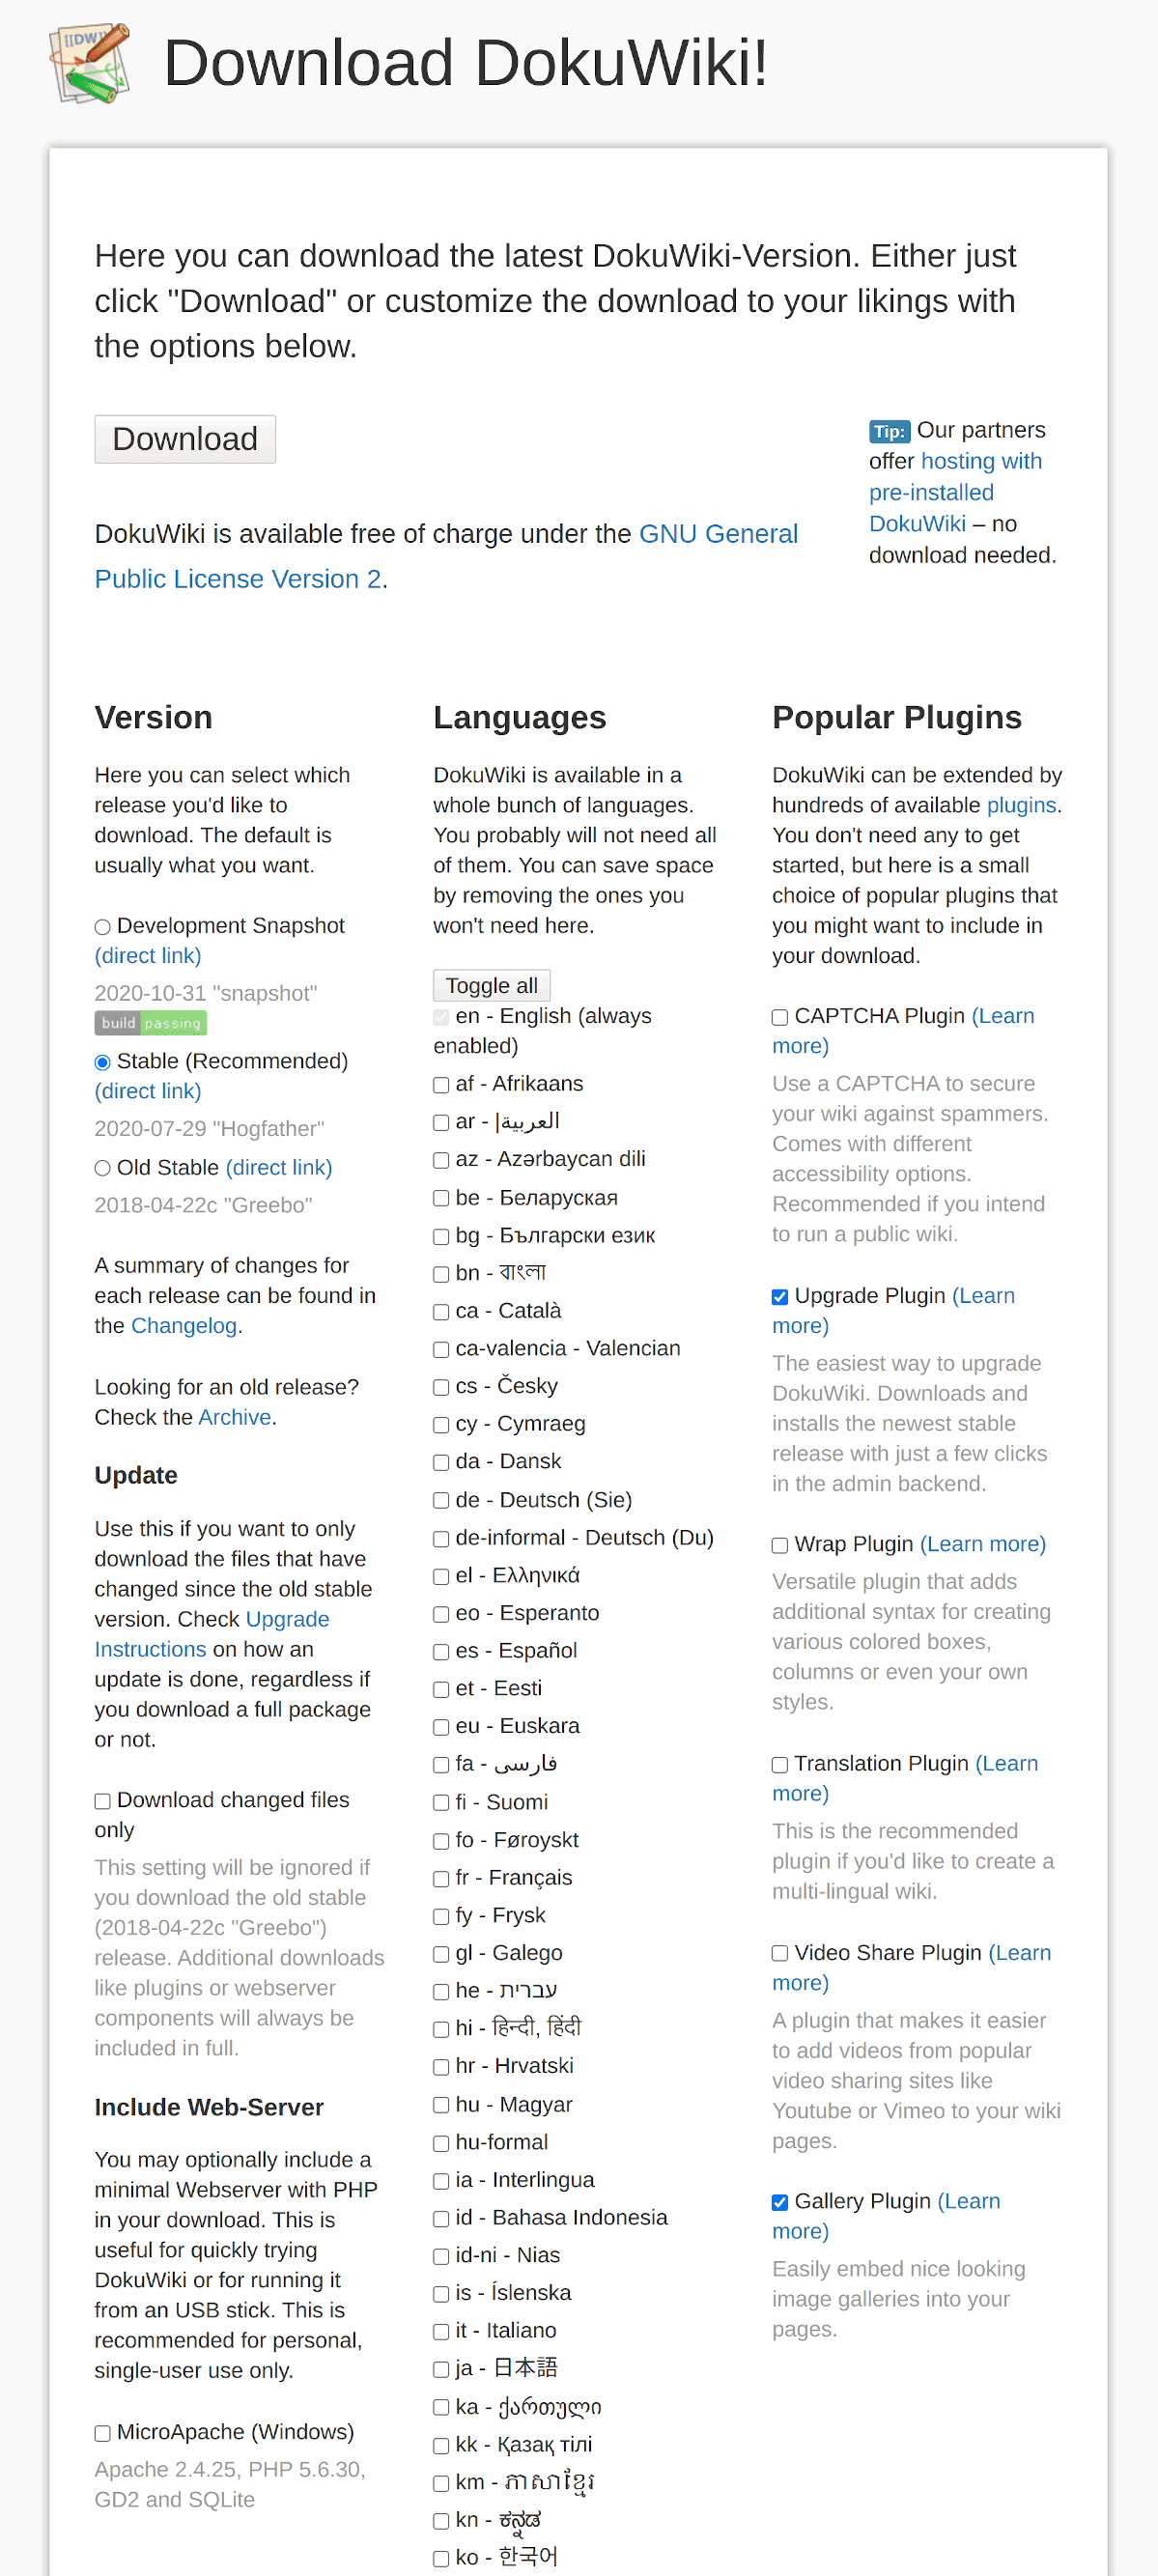
Go to https://download.dokuwiki.org and select:
- Version: Stable
- Language
- Recommended plugins: Upgrade and Gallery
Then Press the Download button. You will get a file with name like:
dokuwiki-1cfaeec3c07f3ccf64d46cb038040184.tgz
Web Server Setup
Read DokuWiki System Requirements here.
Apache requirements
Mod_rewrite must be enabled
sudo a2enmod rewrite
sudo systemctl restart apache2.service
PHP requirements
PHP 7 is recommended. PHP extensions required:
sudo apt-get install php-mbstring php-xml php-gd
Apache setup
Create a directory in Apache document root, for example /var/www/html/wiki and unpack there the downloaded file:
cd /var/www/html
sudo tar xpvf dokuwiki-1cfaeec3c07f3ccf64d46cb038040184.tgz
The above command will create a directory dokuwiki. Rename it using any name you want, in my case
sudo mv dokuwiki wiki
Make the following changes to Apache setup
sudo nano /etc/apache2/sites-available/wiki.conf
Add the following
<VirtualHost *:80>
    ServerName  wiki.example.com
    ServerAdmin you@your-email.com

    DocumentRoot /var/www/html/wiki

    <Directory /var/www/html/wiki>
        Options -Indexes +FollowSymLinks -MultiViews
        AllowOverride All
        Require all granted
    </Directory>

    <LocationMatch "/(data|conf|bin|inc|vendor)/">
        Require all denied
    </LocationMatch>

    ErrorLog ${APACHE_LOG_DIR}/wiki.example.com_error.log
    LogLevel warn
    CustomLog ${APACHE_LOG_DIR}/wiki.example.com_access.log combined
</VirtualHost>
Directives in line 13 are mentioned in detail here.
Enable your wiki website:
sudo a2ensite wiki.conf
Restart Apache:
sudo systemctl restart apache2.service
Secure your wiki
This step is optional but strongly recommended for public wikis. Add an SSL certificate to your wiki for free, using the amazing Let’s Encrypt.
Apache Mod_ssl must be enabled
sudo a2enmod ssl
sudo systemctl restart apache2.service
Let’s Encrypt certbot is available in Debian 10 repos. Instructions here. All instructions here.
sudo apt-get install certbot python-certbot-apache
Then, the only thing you have to do is:
sudo certbot --authenticator webroot --installer apache -d wiki.example.com
(of course you have to give your real domain and not wiki.example.com).
Now, you can access your wiki at: https://wiki.example.com
Permissions
Read about the required file permissions here.
Make the following changes:
cd /var/www/html/wiki

sudo chown -R www-data data/
sudo chmod -R 775 data/
sudo chown -R www-data lib/plugins/
sudo chown -R www-data lib/tpl/
sudo chmod 755 lib/
sudo chown -R www-data conf/

cd data/

sudo chmod 2775 {attic,cache,index,locks,media,meta,pages,tmp}
sudo chown www-data {attic,cache,index,locks,media,meta,pages,tmp}
Install
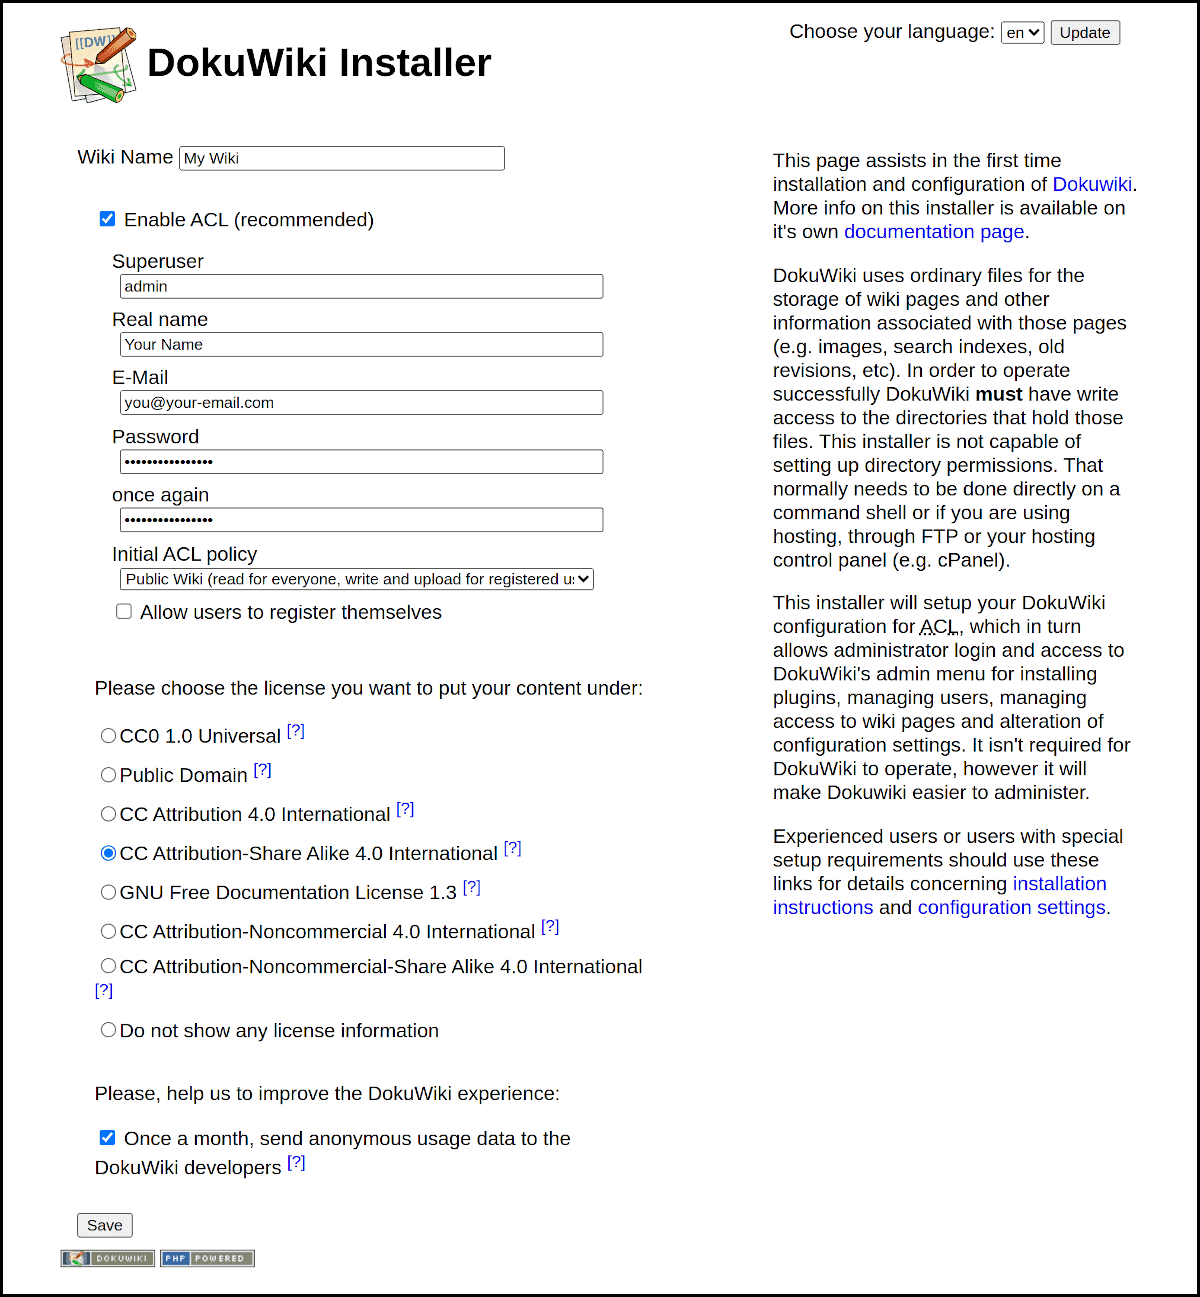
Run the DokuWiki Installer. Point your browser to
https://wiki.example.com/install.php
Make the desired changes and click SAVE
After pressing the SAVE button, you will get the message:
The configuration was finished successfully. You may delete the install.php file now. Continue to your new DokuWiki.
cd /var/www/html/wiki
sudo rm install.php
Customize your wiki
Configuration settings
DokuWiki is highly configurable. Details here.
Login with the credentials you gave in the previous step and press the Admin link. You will see the Administration panel. Now press the link Configuration settings.
Make the following changes and press SAVE
| Display | |
| breadcrumbs | 0 |
| youarehere | check it |
| maxseclevel | 5 |
| useheading | Always |
| Links | |
| target»interwiki | _blank |
| target»extern | _blank |
| Syndication (RSS) | |
| sitemap | 7 |
| rss_type | RSS 2.0 |
| Advanced | |
| userewrite | .htaccess |
| useslash | check it |
.htaccess
You need an .htaccess file to support Nice URLs. First copy the default file
cd /var/www/html/wiki
sudo cp .htaccess.dist .htaccess
Edit .htaccess
sudo nano .htaccess
and make the following changes
## You should disable Indexes and MultiViews either here or in the
## global config. Symlinks maybe needed for URL rewriting.
#Options -Indexes -MultiViews +FollowSymLinks

## make sure nobody gets the htaccess, README, COPYING or VERSION files
<Files ~ "^([._]ht|README$|VERSION$|COPYING$)">
    <IfModule mod_authz_core.c>
        Require all denied
    </IfModule>
    <IfModule !mod_authz_core.c>
        Order allow,deny
        Deny from all
    </IfModule>
</Files>

## Don't allow access to git directories
<IfModule alias_module>
    RedirectMatch 404 /.git
</IfModule>

## Uncomment these rules if you want to have nice URLs using
## $conf['userewrite'] = 1 - not needed for rewrite mode 2
RewriteEngine on
#
RewriteRule ^_media/(.*)              lib/exe/fetch.php?media=$1  [QSA,L]
RewriteRule ^_detail/(.*)             lib/exe/detail.php?media=$1  [QSA,L]
RewriteRule ^_export/([^/]+)/(.*)     doku.php?do=export_$1&id=$2  [QSA,L]
RewriteRule ^$                        doku.php  [L]
RewriteCond %{REQUEST_FILENAME}       !-f
RewriteCond %{REQUEST_FILENAME}       !-d
RewriteRule (.*)                      doku.php?id=$1  [QSA,L]
RewriteRule ^index.php$               doku.php
#
## Not all installations will require the following line.  If you do,
## change "/dokuwiki" to the path to your dokuwiki directory relative
## to your document root.
#RewriteBase /dokuwiki
RewriteBase /
#
## If you enable DokuWikis XML-RPC interface, you should consider to
## restrict access to it over HTTPS only! Uncomment the following two
## rules if your server setup allows HTTPS.
#RewriteCond %{HTTPS} !=on
#RewriteRule ^lib/exe/xmlrpc.php$      https://%{SERVER_NAME}%{REQUEST_URI} [L,R=301]
Install (and update) plugins
You can easily install, update or uninstall plugins using:
Admin ➙ Extension Manager
Available plugins: https://www.dokuwiki.org/plugins
Recommended plugins:
- DW2PDF Plugin (PDF export)
- OpenOffice.org/LibreOffice.org Export
- EditTable Plugin (visual table editor)
- Video Share Plugin
- Google Analytics for DokuWiki (for public wikis)
- webmaster Plugin (for public wikis)
Upgrade your wiki
Each time you log in, you will see notification if new version is available.
Upgrade your DokuWiki using:
Admin ➙ Additional Plugins ➙ Wiki Upgrade
ATTENTION: ensure that you have upgraded DokuWiki Upgrade Plugin (using Extension Manager) before you try to upgrade DokuWiki.
REMARK: install.php must be available during upgrade, so
cd /var/www/html/wiki
touch install.php
chown www-data install.php
You can delete it after upgrade.
Additionally index.php must be writable. So:
chown www-data index.php
DokuWiki and SEO
If you have a public wiki with its own domain, you have to register your site to various Webmaster Tools. The most important are Google Search Console, Bing Webmaster, and Yandex Webmaster.
You may use the Webmaster Plugin to add meta tags for verification. The most simple method is to verify site ownership by uploading a File you get from each Webmaster Tool (recommended).
More details about DokuWiki and SEO here.
Submit DokuWiki Sitemap
You can submit Dokuwiki Sitemap on Google, Bing, Yandex, etc using the URL:
https://wiki.example.com/doku.php?do=sitemap
More details about DokuWiki and Google Sitemap here.
Add Google Analytics Code to DokuWiki
You may use the plugin Google Analytics. The most simple method (recommended) is to use the DokuWiki hook meta.html.
Create a file meta.html inside main template and add the Google Analytics code in this file:
cd /var/www/html/wiki
sudo nano lib/tpl/dokuwiki/meta.html
Add the Google code. Something like this
<!-- Global site tag (gtag.js) - Google Analytics -->
<script async src="https://www.googletagmanager.com/gtag/js?id=UA-YOUR-ID-HERE"></script>
<script>
  window.dataLayer = window.dataLayer || [];
  function gtag(){dataLayer.push(arguments);}
  gtag('js', new Date());

  gtag('config', 'UA-YOUR-ID-HERE');
</script>
Remember to replace UA-YOUR-ID-HERE with your own code.
How to Track Subdomain in Google Analytics
If your DokuWiki uses a subdomain (“wiki” in this tutorial) of your main domain (“example.com” in this tutorial) you need to track subdomain traffic in Google Analytics. The easiest way is to create a new View and add a Filter to display the full URL in reports.
The official Google documentation is here.
A more detailed guide is available here.
If you prefer a video:
Entrepreneur | Full-stack developer | Founder of MediSign Ltd. I have over 15 years of professional experience designing and developing web applications. I am also very experienced in managing (web) projects.


